I recently thought to try something in PS and I really liked the results. I added dimension to the paper I was designing by adding a distorted Gradient Fill layer.
I haven’t really provided any tutorials here before but I figured there was no time like the present to start sharing.
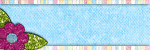
Take your paper from this: 
To this: 
Or this:

Start with a blank canvas and fill it with the color of your choice. 
Open the overlay you want to use and add put it over your colored layer.
Go to the blending options of your overlay layer. 
Change the blending mode of the overlay to your liking. For this example, I simply changed the Blend Mode to Overlay.

Add additional overlay layers and adjust to your liking.
Add a Gradient Fill layer. 
This is the window that will appear for the Gradient Fill. 
Pick the style of gradient you want to use. For this example, I selected Silver. 
Change the Style to Reflected. 
Change the Angle to your liking. For this example, I changed it to 110 degrees. 
At this point, you might want to remove any white from your gradient or make some color adjustments. To adjust this just click on the gradient bar.

The Gradient Editor will open. Just click on the color stops and change the colors. You can also add some additional stops and colors in here too. 
Once you have the Gradient Fill layer to your liking, Rasterize the layer. 
From the menu bar, select Distort and then Wave. 
The Wave window will open. From here you will adjust the settings to get the wave effect that your want.
This is the settings I have for this example:
Number of Generators: 10
Wavelength: Min. 575 Max. 999
Amplitude: Min. 70 Max. 500
Scale: Horiz. 74% Vert. 8% 
Select Blending Options for the gradient fill layer. 
Change the blend mode. 

This is what my example looks like with these settings: 
This can look very different depending on what blending options you choose. I decided to change the settings for this example. The new settings are Blending Mode Overlay at 75% Opacity with the Fill Opacity staying at 75%. 
That change dramatically changed the final result. 
You can add as many overlay layers before or after you have added the gradient layer. You could even start with a completed paper from any of your kits and get the same kind of results. The key is to just play with the settings until you get the desired effect.
When using the paper for a layout you can add to the effect by also distorting your shadow layer.
I am, by far, no expert and there are probably other ways to achieve this effect but I really hope you enjoyed this tutorial.


7 comments:
Awesome Tutorial! Thanks so much! I have bookmarked this one!
Wow. I am new with this thing.. I will try playing with that :)
Thanks bunches! I'm looking forward to playing with this!
Awesome tutorial! TYSM!
Great tips, thanks so much for sharing!!
Love it~ cant wait to try it. Thank you!
kool suggestion.never tried that before
Post a Comment